How to Choose Bay Windows for Your Home?

Choosing bay windows is not simply a matter of adding charm to your home. It involves light, structure, ventilation, energy performance, and everyday comfort. A well-planned bay window can create a bright reading corner, widen a cramped living room, and frame a garden view. A poor choice may cause drafts, glare, moisture, or difficult maintenance.

This guide explains how to evaluate bay windows with practical details in mind. You will learn how to compare projection depths, window styles, frame materials, glazing options, and roof designs. We will also consider your wall structure, local climate, furniture layout, and budget. For example, a deep projection may provide useful seating, but it can reduce outdoor space and require stronger support. Triple glazing may improve insulation, yet its weight and price need careful assessment.

Reliable decisions should combine product information with professional advice. Experienced window contractors can inspect the opening, identify structural risks, and confirm suitable installation methods. Local building requirements may also affect dimensions, emergency access, drainage, and energy ratings. Manufacturer specifications matter, but they should not be accepted without questions. Some advertised benefits may depend on installation quality.

There is no perfect bay window for every house. An attractive design can still feel uncomfortable in strong afternoon sun. I would also avoid assuming that the most expensive option offers the best value. Measure carefully, request written quotations, and inspect sample frames in natural light. Small mistakes become expensive later. This guide will help you make a more informed and realistic choice.
How to Choose Bay Windows for Your Home?

Define the Purpose and Best Location for Your Bay Window

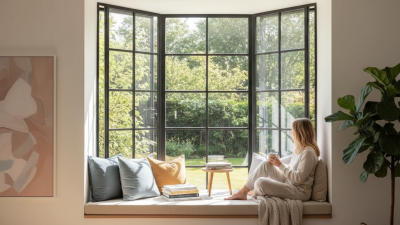
Before choosing a bay window, decide what the space must do. Will it frame a garden, create a reading seat, or brighten a dark dining area? A clear purpose prevents an expensive feature from becoming unused decoration. I once planned a deep window seat without checking furniture clearance. The result looked attractive, but the nearby door opened awkwardly.

Location affects comfort as much as appearance. A south-facing window can provide strong winter sunlight, yet it may cause summer glare and overheating. An east-facing position offers gentle morning light. North-facing windows usually provide steadier, softer illumination. Walk through the room at different times before deciding. Notice reflections on screens, drafts near exterior walls, and views from seated eye level.

Check practical details with a qualified window professional or building inspector. The wall may need structural support, especially when replacing a solid section with glass. Confirm ventilation, emergency escape requirements, insulation, and local planning rules. Measure the exterior space, too. A bay window extending over a walkway may create drainage or access problems. Consider roof design and rainwater flow before installation. My preference is to sketch the room at full scale, though sketches can still miss seasonal shadows. Leave enough sill depth for plants, but not so much that cleaning becomes difficult. Good placement should serve daily habits, not only photographs.

Compare Bay Window Styles, Sizes, and Architectural Features

How to Choose Bay Windows for Your Home?

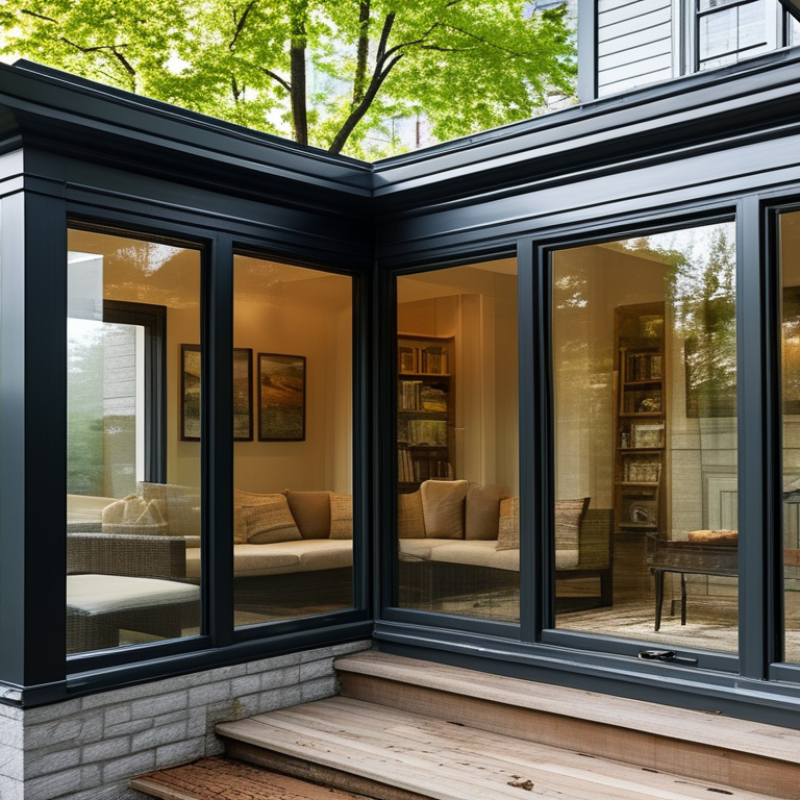
Bay windows differ in shape, projection, and visual weight. A canted bay uses angled side panels and suits traditional façades. A box bay projects at a square angle, creating a compact reading nook. Bow windows use four or more curved sections, giving a softer exterior line. I have found that the best style often matches the home’s existing roof pitch and window rhythm, not personal taste alone.

Measure the wall space carefully before comparing sizes. A three-panel bay may need less width, while a bow window usually requires broader framing. Projection matters too. A deeper bay can hold a bench, but it may reduce walkway space indoors.

Check the sill height, ceiling line, and furniture clearance. Small details matter. Even a few inches can change the room’s balance.

Architectural features should support both structure and comfort. Consider mullion patterns, seat boards, roof caps, drainage, insulation, and low-emissivity glazing. The supporting wall may need reinforcement, especially with masonry construction. A qualified contractor should verify load paths and local building requirements. I once focused too much on the window view and underestimated afternoon heat. That mistake made the room uncomfortable. Exterior shading would have helped, but it should have been planned earlier. Dark frames, decorative trim, and divided lights can add character, though excessive detailing may make a small façade look crowded.

Evaluate Materials, Glazing, Energy Efficiency, and Maintenance

How to Choose Bay Windows for Your Home?

A bay window changes a room’s light, airflow, and heat balance. Start with the frame material. Vinyl usually needs little upkeep, while fiberglass resists movement during seasonal temperature changes. Wood offers warmth and repairability, but it needs regular sealing and repainting. In wet climates, neglected wood can deteriorate around joints. I have seen attractive installations fail because drainage was treated as an afterthought.

Glazing deserves closer attention. Look for low-emissivity coatings, insulated glass, and warm-edge spacers. The U.S. Department of Energy reports that windows can cause 25–30% of residential heating and cooling energy use. A lower U-factor reduces heat transfer, while a suitable solar heat gain coefficient controls sunlight. The National Fenestration Rating Council recommends comparing these values on certified performance labels. More glass is not automatically better. A wide south-facing bay may overheat a living room in summer, even with efficient glazing.

Tips: Match the solar heat gain coefficient to your climate and window direction. Inspect the sill slope, flashing, and exterior sealant before installation. Leave access for cleaning. Maintenance sounds minor. It rarely stays minor when water enters hidden cavities. Check seals annually, clean tracks, and watch for condensation between panes. One imperfect point remains: energy ratings cannot predict every home’s comfort. Shade, wall insulation, and installation quality still matter.

Check Installation Requirements, Building Codes, and Structural Support

How to Choose Bay Windows for Your Home?

A bay window needs more than attractive angles. Before ordering, inspect the wall, floor, and roofline. Measure the rough opening, not just the visible glass. A structural engineer or qualified installer should verify the header, sill, and support brackets. The projection adds leverage to the wall. That detail is easy to miss.

Local building departments may require permits, engineered drawings, and inspections. The International Residential Code addresses structural loads, safety glazing, emergency escape openings, and weather protection. Requirements vary by jurisdiction. Do not assume an existing window opening meets today’s rules. Ask for the applicable code edition in writing. Check property setbacks, too, if the bay extends beyond the wall. A small paperwork delay is cheaper than reframing later.

Energy performance deserves equal attention. The U.S. Department of Energy reports that windows can represent 25%–30% of residential heating and cooling energy use. Select a window with a suitable U-factor and Solar Heat Gain Coefficient from the National Fenestration Rating Council label. On site, installers should use a sloped sill pan, compatible flashing, and continuous air sealing. FGIA installation guidance emphasizes drainage and perimeter sealing. Water stains may appear months later. I would also question decorative roof support without load calculations; it can look solid while carrying little weight. Recheck the design after the first inspection.

How to Choose Bay Windows for Your Home? — Check Installation Requirements, Building Codes, and Structural Support

Planning Dimension What to Evaluate Typical Guidance or Values Installation and Code Considerations
Window Configuration Select the bay window geometry and number of panels. Common configurations include 3-panel, 4-panel, and 5-panel units. Angled bays often use 30° or 45° side panels, while box bays generally use square corners. Confirm that the selected configuration fits the room, exterior wall, roofline, and available framing space before ordering.
Overall Width Measure the available wall span and rough-opening width. Residential bay windows are commonly manufactured in widths of approximately 3 to 12 feet, although custom sizes may be larger. The new unit must fit within the existing or newly framed opening while allowing room for level, plumb, square, flashing, insulation, and shims.
Projection Determine how far the window will extend beyond the exterior wall. Typical projections range from about 12 to 36 inches. A deeper projection increases usable interior space but also increases structural and weatherproofing demands. Check property-line setbacks, walkways, decks, roof overhangs, drainage paths, and local restrictions before selecting the projection.
Structural Support Support the window assembly and any roof or seat structure carried by it. Support may include engineered brackets, structural cables, a framed platform, or a foundation-supported structure, depending on size and design. Do not rely on the window frame, siding, trim, or nonstructural sheathing alone. A qualified professional should verify load paths and attachment points.
Wall Framing Assess the existing studs, headers, sill, and load-bearing wall conditions. Removing or altering studs usually requires a properly sized header and adequate jack studs or other approved support. An engineer or qualified building professional may be required when the wall is load-bearing, the opening is wide, or the installation changes upper-floor or roof loads.
Rough Opening Match the manufacturer-specified opening to the actual window dimensions. The rough opening is normally slightly larger than the unit to allow for shimming, adjustment, insulation, and movement; the exact allowance varies by window system. Use the approved installation instructions rather than applying a universal clearance. Verify diagonals, sill elevation, and the opening’s structural integrity.
Egress and Emergency Escape Determine whether the room requires an emergency escape and rescue opening. Where required by local code, the opening must meet minimum clear-width, clear-height, and net-clear-opening requirements. Common residential references use a 5.7 sq. ft. net opening, reduced to 5.0 sq. ft. at grade level, with a maximum sill height of 44 inches; local rules may differ. Measure the clear opening created by the operable sash, not the overall glass or frame size. Verify requirements with the local building department.
Headroom and Interior Clearance Maintain usable space around the window and any seat board. Allow space for curtains, blinds, handles, cleaning access, furniture, and the window’s operating arc. Check nearby doors, cabinets, radiators, electrical outlets, heating registers, and stairways before finalizing the location.
Energy Performance Select suitable U-factor, solar heat-gain coefficient, glazing, and air-leakage performance. Lower U-factor generally improves insulation. Solar heat-gain coefficient should be selected according to climate, orientation, shading, and desired winter solar gain. Use the local energy-code limits and the window’s certified performance label. Consider low-emissivity glazing, insulated frames, and properly sealed joints.
Weatherproofing Protect the opening from rain, wind-driven water, and air leakage. A durable installation typically uses a sloped sill, sill pan or equivalent drainage approach, compatible flashing, end dams where required, and a properly integrated head flashing. Follow the recognized installation sequence: integrate flashing with the water-resistive barrier, seal compatible materials, and avoid blocking intended drainage paths.
Roof or Head Cover Provide weather protection over the projecting bay when the design requires it. A bay roof commonly includes a sloped surface, metal or membrane flashing, edge protection, and a connection to the wall’s water-management system. The roof must shed water away from the wall and should not discharge onto siding, trim, a lower roof, or a pedestrian path without suitable drainage control.
Insulation and Air Sealing Seal the perimeter and insulate enclosed cavities without distorting the frame. Use low-expansion window-and-door foam or another code-appropriate sealant at the perimeter, with insulation in surrounding framed cavities. Do not overfill the gap or use materials that can bow the frame. Provide a continuous interior air seal and an exterior weather-resistant seal.
Permits and Building Codes Identify permits, inspections, and applicable residential code provisions. A new or enlarged opening, structural alteration, exterior projection, or change affecting egress commonly requires a building permit, but requirements vary by jurisdiction. Contact the local building department before construction. Ask about zoning setbacks, structural plans, energy code, emergency escape, historic-district rules, and inspection stages.
Electrical and Mechanical Systems Check for concealed wiring, plumbing, ducts, and heating equipment inside the wall. Existing services may need relocation or protection before the rough opening is created. Use a qualified electrician or tradesperson when circuits, outlets, pipes, gas lines, or HVAC components are affected. Keep required clearances from heating equipment.
Installation Tolerances Keep the unit level, plumb, square, and properly supported during fastening. The frame should be checked at the sill, jambs, and head; the sash should operate smoothly after the unit is secured. Use corrosion-resistant fasteners appropriate for the substrate and follow the approved fastening locations. Never force the frame into alignment with fasteners.
Maintenance Access Plan for cleaning, repainting, sealant inspection, and hardware adjustment. Exterior glass and roof areas should remain safely reachable for routine inspection and maintenance. Provide safe access for upper-level installations and inspect flashing, sealants, drainage openings, and support connections periodically.
Professional Review Determine whether the project needs an architect, engineer, or licensed contractor. Professional review is especially advisable for large projections, upper-story installations, load-bearing walls, unusual foundations, or complex roof connections. Obtain written structural details where necessary and coordinate them with the permit drawings and window manufacturer’s installation requirements.

Important: Dimensions, structural requirements, energy limits, egress rules, and permit procedures vary by location and project. Confirm final requirements with the local building authority and a qualified construction professional.

Set a Budget and Choose a Qualified Bay Window Installer

How to Choose Bay Windows for Your Home?

A bay window can brighten a dim room and create a useful reading nook. However, its price includes more than the window itself. Measure the opening, inspect the surrounding wall, and ask about structural support before setting a budget. Include costs for removal, framing, insulation, interior trim, exterior cladding, and possible repairs. A written estimate should separate materials, labor, permits, disposal, and taxes. Keep a reserve of 10–15 percent for surprises. Older homes often hide them.

Tips: Compare at least three detailed quotes. Check recent customer references, proof of insurance, relevant training, and experience with bay window installations. A qualified installer should explain how the load will be supported and how water will drain away. Ask for a written timeline and warranty terms. Do not choose the lowest price automatically. It may exclude flashing or finishing work.

During the site visit, watch how carefully the installer measures. They should examine the sill, wall condition, exterior drainage, and nearby wiring or pipes. Ask who will complete each stage, from framing to sealing. Local permit requirements may apply, so confirm responsibilities in writing. I once assumed interior repairs were included in a quote; they were not. That small oversight changed the final cost and schedule. Clear questions early prevent awkward disputes later.